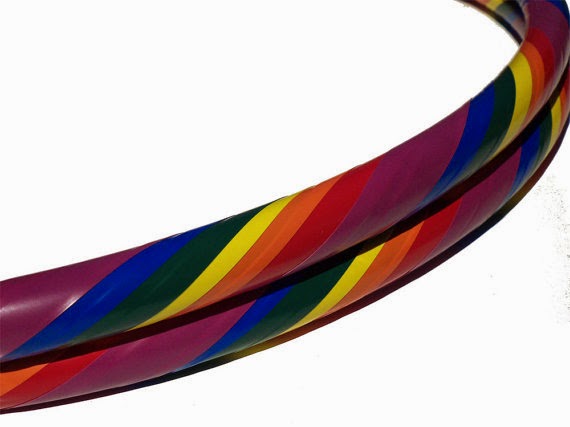
DIY Infinity Style Collapsible Hula Hoop
This is the type of hula hoop that folds up to half of its original size.
No buttons, no clickers, no bungees or frills. Just tubing, connectors and patience.
Here is a video of the type of hoops that you will be making:
Click here to see the video
Step 1: TUBING
- I recommend Silverline PEP tubing found at most local Lowe's stores (It's black irrigation tubing. Schedule 80. Also known as "funny pipe".)
- Be aware that some 3/4" 100psi rolls have thin walls and the connectors do not stay in as well.
- This does not allow the tubing to firmly hold the connectors and the hoop will FALL APART when it is folded up.
- Test all 3/4" 100psi tubing prior to completely unwrapping the roll by cutting off the straightened end piece and testing a connector on the end of the roll.
- I no longer order tubing blindly for this reason. I make it a point to go to the store to make sure that the tubing is in good condition before I purchase it.
1/2" 125psi - Skinny and great for practicing hoop making skills. This tubing makes great beginners hoops, trick hoops, poi hoops. The smallest inside diameter for this tubing I have made with success is 26". Largest inside diameter without warping becoming a big problem is 42". I tend to only offer these in sizes 28"-38" ID (inside diameter).
(You can use this web calculator to get the circumference for your hoops from the diameter size: http://www.onlineconversion.com/circlesolve.htm)
3/4" 100psi - Thicker than 1/2" and what most people are looking for in a hoop. The smallest inside diameter that is easy to work with without much fear of kinking is 34" (don't let it sit in a figure 8 for very long when it's new) and the largest inside diameter without too much warping is about 46". If you plan on shipping hoops to customers I suggest stopping the sizes at 44" or even 42". Anything over that size gets bigger shipping charges via USPS Priority mail.
3/4" 160psi - Thicker and great for the workout hoops. The smallest inside diameter I work with on these is 34" but they can be stubborn. 36" is easier to manage. The largest inside diameter without much warping again is 46" and 48" also holds up fairly nicely.
(Please note that 1" ID tubing is too large and difficult to manipulate into this process. You have to do an entire heat treatment on the tubing in order to let it harden and hold shape so that it will not kink and this can take several attempts over the course of several days to get them to function properly. I have phased them out as collapsibles and only make them for REALLY heavy workouts hoops. It also hurts and/or bruises your hips.)
All tubing above is referred to by the inside diameter of the tubing as that is how you will have to refer to it at the hardware store in order to get the correct items. 3/4" is the INSIDE DIAMETER of the tubing, if you measure from one outside wall of the tubing to the the other outside wall of the tubing it is closer to 1". BUT, if you walk into a hardware store and ask them for 1" connectors for your 3/4" tubing they are not going to fit. You have to refer to the inside diameter of the tubing.
*********************************************************************************
Step 2: TOOLS
1.) PVC CUTTERS:
- Cough up the dough for a pair of PVC cutters.
- Just do it, it's only like $14 bucks and you're going to be so happy about it.
- It's two seconds and you're done cutting.
- Don't nickle and dime it, just buy the PVC cutters.
- I'm not even going to suggest anything else to you.
- Your time is VALUABLE AND YOU ARE WORTH IT!
- If you've never used them before be sure to ask someone who knows, or watch a tutorial on it. It took me half an hour to figure them out.
- Please also note that they are SHARP AND WILL CUT YOUR FINGER OFF OF YOUR BODY! Literally, off.
- Use caution.
2.) LIGHTERS:
Do not use really, really cheap ones because they can explode.
I prefer regular BIC lighters that are solid plastic.
Pry off the child proof part on the top with a pair of small pliers so it doesn't get hot and burn you.
(You can also use a hair dryer but it will take longer. Heat guns turn the tubing into putty and just get it entirely too hot. I bought one about a year ago, used it once and returned it the next day.)
You can also use boiling hot water but the steam can be problematic as it can burn you and the hot water can roll down the tubing and burn you as well.
Hot water also straightens out the tubing and it is harder to get the tubing back into circular shape.
3.) END NIPPERS:
Typically in the electrical section. I usually find mine at a discount store or dollar store, just depends. You probably don't need these if you have a Dremel tool or a bench grinder.
4.) Box Cutter:
Use one with a thin blade or a Dremel Tool - For trimming connectors.
5.) Safety Goggles:
For trimming connectors. But quite honestly you should wear safety goggles anytime you use tools.
6.) Goo Gone:
If you're going to be selling or gifting Naked Hoops (no tape) you'll want to clean them up before hand. If your tubing is disgustingly dirty you'll need to clean it up before you tape it up or finish it because that dirt on the tubing is totally gnarly.
7.) Flexible Tape Measure:
For measuring your diameter.
8.) Sharpie:
You always, Always, ALWAYS!!! need a sharpie.
*********************************************************************************
Step 3: Connectors
Use only LASCO PVC (dark grey) connectors. They are available at Home Depot(and some Lowe's stores). Other connectors do not work as well.
- When asking for them refer to them 3/4" or 1/2" insert couplings.
- If the "Master Plumber" on site doesn't know what you're talking about tell them that they are Schedule 80.
- If they still don't know what that is tell them that they are BARBS that connect IRRIGATION TUBING a.k.a. FUNNY PIPE for making SPRINKLER SYSTEMS.
Some Home Depots do not carry these parts because there is a lack of need for them in urban areas. Some Home Depots only carry them seasonally. And some Home Depots don't even know that they have them if they do. It's often better to just walk around the entire store to find out if they are there or not. If someone does find them for you and tries to convince you that you don't need 48 of them to make a sprinkler system tell them that you are making hula hoops and that you do indeed need them and they should stock more because you're going to need HUNDREDS OF THEM. They can also order them for you by the case but it takes a few days.
*********************************************************************************
Step 4: MEASURING
Pick a diameter size and decide if you want to go with inside diameter or outside diameter. I find a lot of people have problems with their current hoop and have no idea why. My assumption is that people are getting hoops that are measured by their outside diameter, great if you are doing off the body work, terrible if you're trying to get it to around your waist. Especially if you're a larger Hooper and your waist measurement is a delicate part of the equation when picking out a hoop for waist hooping.
Example: A 42" diameter hoop
Outside diameter:42"
Inside diameter:Closer to 40"
This example shows that the tubing that is actually going around your waist is 40" and the outside is 42", which was the size someone recommended for you. But you're actually trying to push 40" around your waist...not 42". I find this causes frustration..it did for me. Now I measure all of my hoops by the inside diameter and do outside diameter by request only.
If you're not a math wiz or don't want to take the time, or don't have the time to calculate your pi's and whatnots go here and use this calculator.
I round to the nearest 1/4", either up or down depending on the circumstances of the circumferences.
http://www.onlineconversion.com/circlesolve.htm
Figure out your diameter size and how many inches you need to measure for your circumference and if you want to go with inside/outside diameter.
Example:
42" inside diameter
Measure 132 around the INSIDE of the tubing, hold tape measure firmly in place as you go around.
42" outside diameter
Measure 132 around the OUTSIDE of the tubing, hold tape measure firmly in place as you go around.
When you get to the end mark that spot with a sharpie and make as straight a cut as you can with your PVC cutters.
You can make a template hoop if you like, GO FOR IT! I totally have faith in you.
*********************************************************************************
Step 5: Determine Amount of Connectors
Four Connector Hoop - These can be stubborn and irritating in the beginning but in the end the result is a hoop that has a place to release pressure at each bend in the tubing. Tubing is a bit like clay in that it creates "memory" as to how it has looked in the past and how it continues to want to look. It takes a lot to beat that memory out of it and having a place for the tubing to release on all four focus points tends to give it a longer lifespan and require less reshaping, hot water soaks and much less shouting and frustration. It will take awhile to open up quickly and you will have to work with it to get it to behave for about a month. It's also just a bit heavier because it has four connectors in it. You also have to work around four interruptions in your tape design.
Two Connector Hoop - This is the hoop most people buy because it POPS RIGHT OPEN AND IS "SO EASY AND PERFECT". And it still is a great hoop. There is less interruption in the taping design and it does open up easier. But, there will be a time when it begins to warp in those two long stretches of hoop where there is nowhere for the pressure to release. Great for beginners, takes a lot less time to make and a couple bucks less because it takes two less connectors than a four connector hoop.
One Connector Hoop - Contrary to popular belief you can absolutely collapse a one connector hoop. The problem is opening it back up. A one connector hoop will collapse with no issues as long as you hold the connector on the side by your hand when you close it up. When you open it up the connector has to be in a certain location in order for it to open. If a one connector doesn't open right up then you have to rearrange the tubing in order for it to do so. I'll put instructions on this up in a few. This is how I make my personal hoops. (I will create a video to show this process as soon as I can. And I will post a link to it here.)
*********************************************************************************
Step 6: Trim Connectors
Yes you need to do this or your hoop will not collapse.
Take a look at one of your connectors. It should have nubs. Two big ones, a circular looking one in the middle and two places that look like little circles in the ridges of it. Those seriously need to come off. Yes you can do it.
Take your End Nippers and Nip the biggest parts off as well as you can, you don't really have to do this part if you bought the Dremel tool or sometimes I even use a bench grinder to buff these off with a grinding wheel.
- Take your box cutter and go at the remaining nubs as if you are whittling a stick.
- Push with your thumbs, keep your fingers out of the way and cut AWAY FROM YOURSELF!
- Hold firmly, don't let it slip.
- If you're knife isn't sharp enough THROW IT AWAY AND GET ONE THAT IS.
- I have permanently altered the fingerprint on the pointer finger of my left hand from not using a sharp enough knife that was too wide and not holding onto the connector enough. To top it all off, I did it twice, and now a large X is permanently in my finger print for the rest of my life. No bank robbing for me I guess.
If you've got a dremel tool you can and sand down the nubs or cut them away slowly. WEAR SAFETY GOGGLES! Little plastic pieces do not feel good in your tear ducts. I would suggest doing this outside in a place where you won't need to sweep or pick up all the little pieces that this messy process is going to make.
Trimming the ends of the connectors:
Shortening the connectors has the benefit of the connector taking up less space in the tubing so that the hoop remains rounder in the areas where the tubing has been inserted. I use the pvc cutters for this process. Cut very slowly at the first ridge from the end of the connector. Do this on both sides. (I will make a video of this process as soon as I can.)
*********************************************************************************
Step 7: Insert the Insert Couplings
Now that you have trimmed connectors, measured tubing, you have your heat source and love is in your heart then let's get this thing put together!
Get your PVC Cutters and close them up. You can use them to push the connector into the end of the tubing. Make sure they are closed up with the metal locking thing on the end so that they have no way that they can open up and bite you. You can also use the floor to push it in but you can't see the connector moving into the tubing as well if you do it this way.
Take your heat source and heat the end of your tubing, you may want to practice this on a scrap piece to get it right, it does take awhile to get it down pat.
You want the connector to go in without crumpling the tubing, the tubing should be hot to the touch but not burning.
If your tubing crumples up or bubbles out you heated too long. Let it cool, cut off that end with your PVC cutters and start over. Remeasure your tubing if you do this.
The connector should be a little hard to push in and should only go half way into the tubing. If it hurts your soul when you start pushing it in then heat a little bit more and try again.
If it goes in too far and you can't get it back out you heated the tubing up too much. Wait for it to cool, cut that end off and start over. It's going to be OK. Be sure to remeasure your tubing if you do this.
When you get your connector in halfway let the tubing cool completely before heating the other side and connecting it together. This is a great time to go get some nachos.
Heat the other end of the tubing and insert the connector into the other side. If it slides too far you didn't let the other side cool down enough.
Cut it off, start again, remeasure if you have to do this.
If you choose a One connector hoop you are finished! If you choose a two connector hoop take your circumference and divide it by two. Measure, mark, cut and repeat the connector process for the second connector. If you picked a four connector hoop take your circumference and divide it by 4. Measure, mark and insert each connector one at a time until you've got it done.
*********************************************************************************
Step 8: Clean it, Tape it, Hoop it!!!
Clean up your hoop with Goo Gone or your cleaner of choice. Let it dry completely before you continue.
I you're making a Naked Hoop. You're done!
If you are taping your hoop I recommend vinyl tape. Peels off easy for easy replacement, sticks to you best if you've got exposed skin in key areas like the shoulders, thighs, abdomen etc and works best if you've got a bit of sweat built up. You can also clean it easily with some of that Goo Gone.
Don't tape over the connectors and make sure to place a wrap of tape over the tape job near each connector, this keeps your tape just in place because almost all tape shifts over time due to use and exposure to the elements.
If you're using glitter/sparkle/non-vinyl tape. It's going to crinkle a bit when the hoop folds up. Use a gaffer or vinyl on top of each side of the non-vinyl tape to help hold it down. It's just a fact of life. Also stay away from concrete and other rough surfaces. That non-vinyl stuff is prone to tears.
*********************************************************************************
Step 9: CORRUPT YOUR FRIENDS AND FAMILY!!!
Hoops make great gifts for everybody. Even those that think they can't do it. Make them a big enough hoop and if they stick to it they'll be asking you for a smaller one in about a month!
HAPPY HOOPING!